# Customization 📝
Here we're considering you already heave a deploy created from Storefront Starter (opens new window) and using our default
@ecomplus/storefront-template. If you're an E-Com Plus merchant, we did it for you 😉
There are several ways to customize Storefront:
- Compose pages through CMS (the easier way);
- Theme/overwrite styles;
- Editing some EJS (HTML) code from default template;
- Add/import custom JavaScript;
- Replacing default scripts and Vue components with Webpack aliases (PRO 🤘);
Before starting, it might be useful to run your Storefront deploy on localhost:
- Make sure Node.js (opens new window) is installed;
- Clone your GitHub repo;
- Install npm dependencies;
- Run serve script;
git clone https://github.com/ecomplus-stores/my-store
cd my-store
npm i
npm run serve
# Build pages within CMS
Access the administrative part (powered by Netlify CMS (opens new window) ❤️)
of your Storefront deploy at https://yourdomain.com/admin/, after login you'll be able to:
- Edit general info and settings such as contact, address and logo:


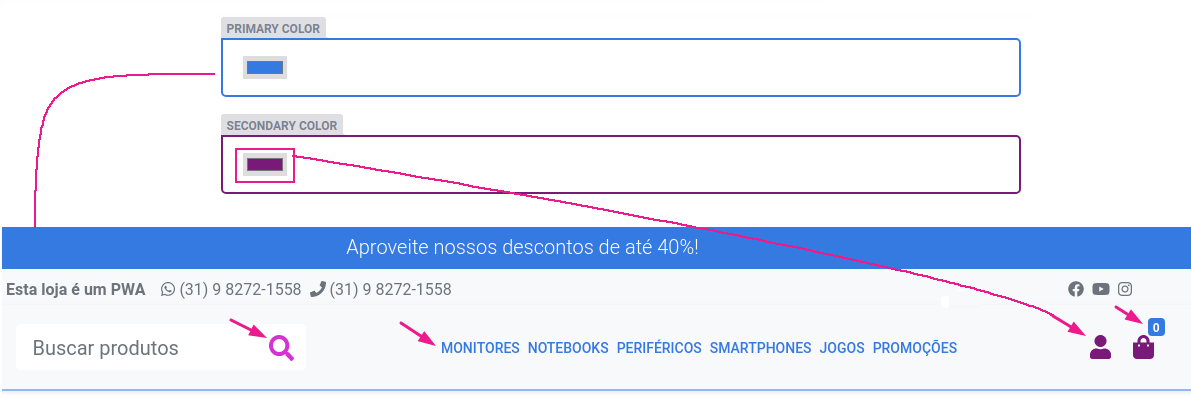
- Set your store's identity colors:
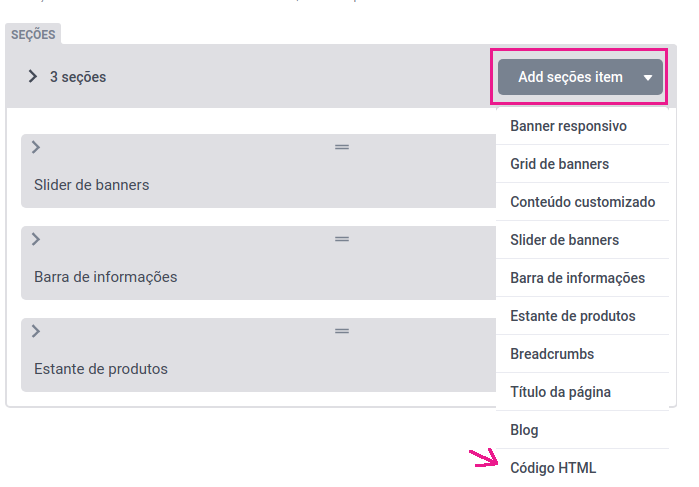
- Organize all pages adding, moving or removing sections (drag and drop):
- Add extra HTML, JS or CSS code for each page or entire website:

- Create or edit extra pages and blog posts;
- Plug and customize additional widgets;
# Theme/overwrite styles
We're using @ecomplus/storefront-twbs
(based on Bootstrap 4 (opens new window)) as CSS/JS foundation,
for details check the base UI usage reference here.
You may also check most important and maintained template
elements selectors.
- If you just want to add few CSS, do it in the CMS at Layout > Insert code > Custom CSS;
- If you're planning to make deeper changes, we recommend to edit SCSS files
(you can use Sass (opens new window) or just plain CSS) directly from GitHub
or locally using your preferred code editor:
- Add new or overwrite styles at
/template/scss/custom-css/_styles.scss; - To replace default template styles you can try setting
Bootstrap SCSS variables (opens new window)
at
/template/scss/_variables.scss; - Finally, you can also start from scratch editing
/template/scss/_main.scssif you don't want to import entire Storefront Template styles (opens new window), for example to make your own footer styles and prevent importing those ones from our default template (perf optim 🚀, not so easy as the previous options);
- Add new or overwrite styles at
TIP
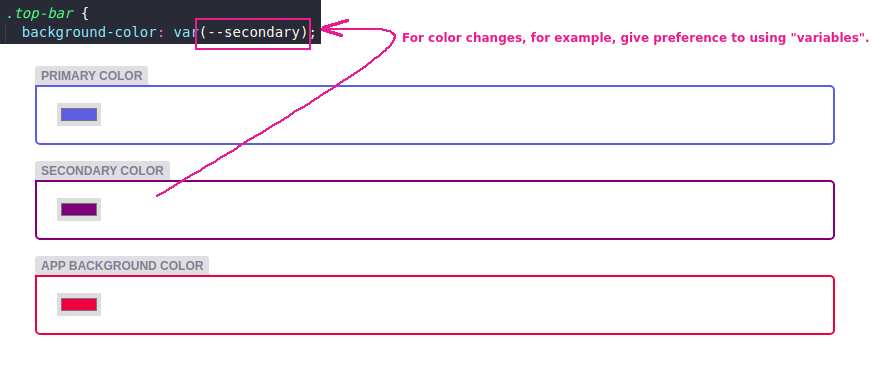
We also encourage to use CSS vars always then possible to make your additional code easily customizable and extensible.
Example using CSS vars
.top-bar {
  background-color: var(--secondary);
}
As example you can also check custom SCSS applied by some of our additional themes, such as Clean Gray (opens new window) and Niche Baby (opens new window).
# Edit pre-rendered views
In the CMS it's possible to include additional HTML snippets,
but to edit default views you should edit
EJS (opens new window) files at /template/pages/ folder:
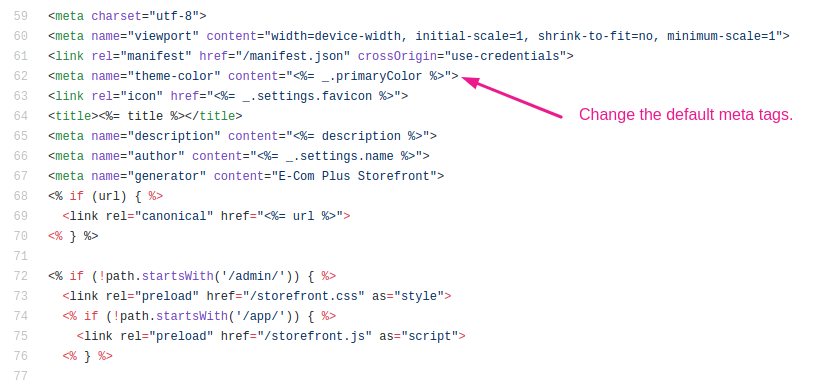
/template/pages/@/meta.ejsto customize meta tags (specially for SEO purposes):
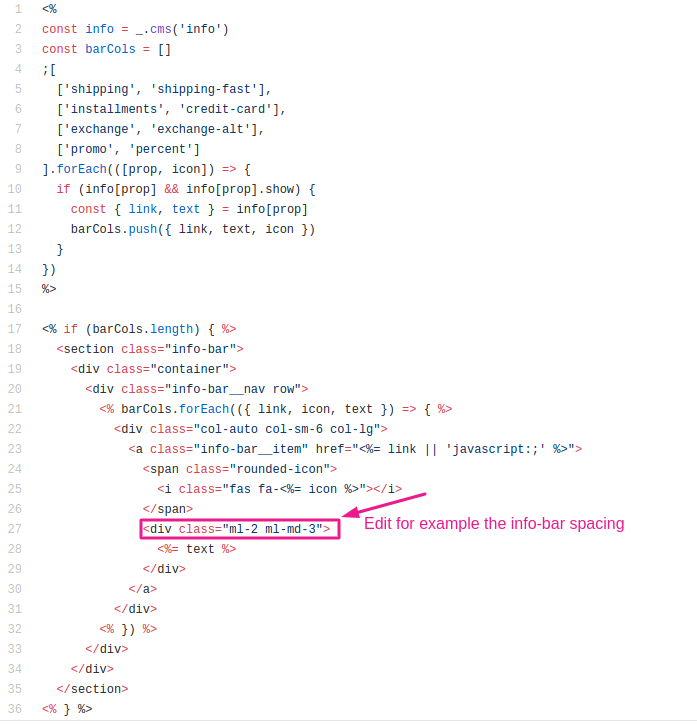
/template/pages/@/sections/to get lot of reusable components 📌, those ones renders the pages main content and are used on the CMS drag and drop tool:
/template/pages/@/layout/to edit common layout organisms (footer, header, menu);/template/pages/app/to edit cart/checkout in a superficial way, just like insert banners, counters or a product carousel for example;
Before start editing HTML, it should be useful to check the components and CSS utility classes available by default.
TIP
EJS is a simple JS based template language to generate HTML markup, of course you can just write plain HTML, but for advanced customization we recommend to check how Storefront renderization works with EJS.
To keep customized stores up to date we still trying to update edited EJS files on new Storefront releases, preserving the edited snippets but updating the non-changed parts by checking Git diff 😎
# Note for product cards
Some pre-rendered HTML elements are overwritten with JS on client by the
respective Vue components, it happens specially with product cards pre-rendered by
/template/pages/@/sections/inc/product-item.ejs.
In such cases, you should try to customize with CSS only or use data-slot attribute to edit
HTML preserving your custom code after hydration, for example:
<div data-slot="buy-button-content">
  <i class="fas fa-shopping-bag mr-1"></i>
  Buy now
</div>
The data-slot value must correspond to a
slot (opens new window) name
of the Vue component, check
<ProductCard> slots here.
As another option, you can also preset JavaScript globals
window.productCardBuyHtml and window.productCardFooterHtml to append HTML to all cards.
PRO TIP
If you need deeper customization, consider creating an Webpack alias to
./html/ProductCard.html (check replacing Vue components).
You don't need to know Vue.js to customize Storefront, Vue is awesome and really easy to learn, for advanced customization it'll give you lot of productivity, but it's not required at all ✌️
# Additional scripts
By default you can use jQuery 3 (slim), Vue.js 2 and some other small libraries globally available, for details check base UI included JS and template JS globals.
- If you just want to add few JS, do it in the CMS at Layout > Insert code
adding
<script>tags before/bodyor (when really needed)/head, you can also add scripts to specific pages using HTML code section; - If you're planning to add lot of JS (or ES) code, it's strongly recommended to
edit JS files at
/template/js/custom-js/folder directly from GitHub or locally using your preferred code editor. You can also create new files and import (opens new window) properly;
TIP
When editing /template/js/ files you can use ES6 features without worrying about
browser support, code there will be parsed and minified.
# Replace Vue components
WARNING
Use it with moderation and only when really needed, skip using for things other then explained below, specially if you don't know Webpack very well.
When easier ways aren't sufficient to make your wanted customization, you can give a try with Webpack 4 aliases (opens new window).
Generally we recommend to use it only for replacing Vue components HTML template 📐, although it would work also for scripts and styles.
You should start getting the original source from
GitHub repo (opens new window),
copy the file you want to replace and paste it inside
/template/js/custom-js/ folder, edit the new file as needed and then create
a storefront.webpack.js file at the root of your repository, as example:
// storefront.webpack.js

const path = require('path')

module.exports = () => ({
  resolve: {
    alias: {
      './html/ProductCard.html': path.resolve(__dirname, 'template/js/custom-js/html/ProductCard.html')
    }
  }
})
Note that all Storefront Components are composed by 4 files (Vue/HTML/JS/SCSS), the Vue file always imports the HTML one with
./html/{ComponentName}.html.